When I posted about sending all the items to my friend "way up north" I decided to not include info/pictures about the actual items since the post was getting too long. So I'm going to do that now. Much of what I'm going to show has to deal with how to stretch out your yarn when you're dealing with finite amounts, for whatever reason.

I don't knit a lot of scarves. They are too boring to handknit, and on my bigger gauge machines I don't have ribbers, so there is the issue of the knitting curling. Recently I've been reading about "killing" acrylics by steaming them heavily. A little scary--purposely applying steam to change the nature of acrylics (they want to keep their shape so regular wet blocking doesn't work at all). I tried it with a scarf I made for the first donation, to the school. I made a 1x1 tuck scarf, steamed it flat, then washed it to see what would happen. It stayed flat! I had used Patons Astra, and Bernat Camouflage, and both worked. The 1x1 tuck almost lays flat to start with though.
For this purple and grey scarf, I had a lot of grey, and the the purples/white/black added up to 1/2 of what the grey was. So I knew I could do 2 rows of grey, 2 rows of another colour (and be left with lots of grey). I did the "other colour" sort of random. It was a 4 row tuck stitch pattern, and then 2 rows of knitting all stitches. There were a couple purples that I had very little of, so I used them when it was a non-grey 2 rows all stitches spot, so they would show up more. I carried the grey and one purple up one side, and the white and black up the other side. For the other purples I did cut the ends. I also put needles out of work to allow for a looser feel and slightly wider scarf.

Since it was still pretty narrow, I made it as long as I could. I find that wide scarves need to be short to wrap once around the neck, but skinny scarves should be long to wrap a couple times. The Astra really reacts nicely to the steam. It lengthened out and got drapey. I will admit that I did not have all this planned when I started out, all I knew was that there'd be two rows grey, two rows another colour!
I also had some bright Astra in yellow and bright peach. I bought a ball of variegated in similar colours and did a 1x1 tuck (2 row pattern) with two rows variegated, two rows yellow, two rows variegated, two rows peach--since again, I had twice as much variegated as the solid colours. This really blends the solid yarns into the variegated yarn, and you don't really see stripes when the colours are that close.
This cocoon was a "D'oh" moment. It's started at the top of the front, worked downwards, shortrowed for the bottom, then worked upwards. The pattern on the front was to be tuck stitch butterflies. Part way up the back, I realized the butterflies were now upside down. The look like little angels!
Above is a blue and white cocoon, I'm not fond of the striping, it was hard to match the sides even though (or because?) i was doing sew as you go.
This one is tuck stitch with Bernat Co-ordinates. In the short row section, you can see the short floats as I carried the yarns up the short rows. Not too bad, but not great.
These hats are variations on the double layer charity hats. The grey one at top left was a little short for a brim, but for a toddler it can be folded back. The yellow and grey ones have a doubled brim that's stitched down inside. Depending on the look, the can fold the brim up for a toque or leave it long for a slouch hat.
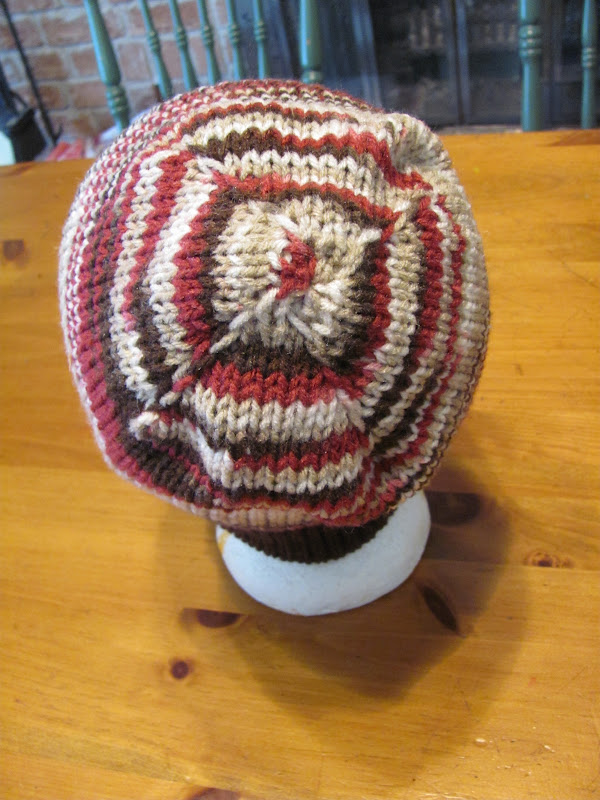
For this hat, I had a pink yarn with a very short repeat, and a Red Heart grey print, and a charcoal solid yarn. I did 4 rows charcoal, 2 rows pink, 2 rows grey print. I ran out of the grey print right at the top, but it's not noticeable. I really liked this one. The grey print is used in these hats below.
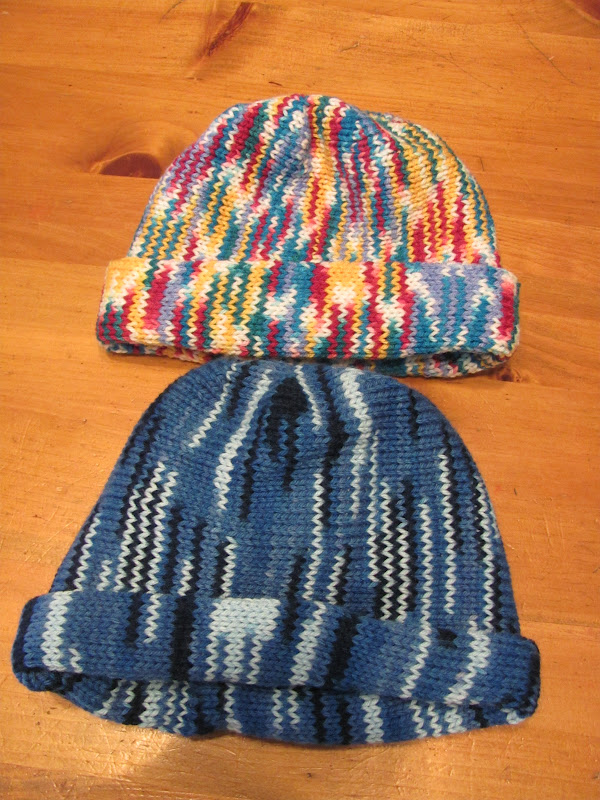
The top one is the double layer reversible charity hat, the bottom one is my side to side double hat.
I wanted to experiment with short rowing the top in 4 sections (I've seen two sections used so that the top of the hat looks like the top of a mitt). I couldn't get it to work out, so I did it one section at a time, meaning that I had to stitch the seams between sections, and work in more ends. Not worth it. I'd rather do the decreases and move stitches over.
Somehow the back got pulled down more than the front, but in real life it is even all around.
This hat uses the same two yarns as in the top left hat in the picture above of the 4 hats. It's simply two rows of grey, two rows of the pinkish. The reason it seems so blended is that the pinkish yarn is two ply. One has a slow colour change of pink/cream/light grey, the other ply is grey.
These two hats are also my sideways hat pattern, but instead of putting all the stitches back to work at once and starting a new section, I put them back one at a time. It comes out with 4 sections and is almost square on top!
The two pictures above just show more hats that I sent. I did find that the sideways hat used less yarn as there is more shaping at either end.
I can't remember if I included this picture before. It's a pair of double thick mittens, done in 100% worsted weight, superwash wool. These babies are thick and warm. A great way to use up mismatched colours is to use them for the inside. Of course, the mittens can be turned inside out, but someone might like the random look too. Or, you can use a thinner, or thicker yarn for the inside. Whatever you have!
The main idea I want to present is to weigh your yarn before starting. If you have equal amounts, then you can do equal size stripes (they can be unequal in the sense of 2-A, 4-B, 4-A, 2-B). If you have double of one colour compared to another, plan accordingly. Use the smaller amount for a band, or thin stripes. If you want to keep a variegated yarn looking saturated, stripe it with a contrast yarn, or with one that matches identically. If you want to soften a variegated yarn, blend it with frequent rows of a matching colour. One row of each will blend very nicely.


2 comments:
WOW!! You have been busy!! I'm impressed. I am going to try some of the baby cocoons. Everything looks great. Great job!!
Thanks Sheryl! I knit those items back in February/early March. I can make about 4 hats in about 1 to 1 1/2 hours, then it takes me about 30 minutes to finish each one that evening while I watch TV (how long it takes depends on what I'm watching, LOL)! The purple scarf took the longest to make though. I won't be doing that again! And, after sending all the stuff, I was looking at my old pictures and remembered that you can knit DK weight on the standard gauge machine, which I have a ribber for, so it could have been SO much quicker!
Post a Comment